 DIY Drones are becoming more widespread, and creating your drone is fun and educational. In this guide, we will teach you to build a drone with drone kits that allow you to modify and build your drone. Let's get started!
Step 1: Choose the suitable drone kit:
Before choosing a drone, picking a kit suitable for your skill level and requirements is essential. Various drones are available for purchase, from beginner-friendly models to advanced options for more experienced drone fans. Consider factors such as the budget, desired features, and the possibility of future upgrades before deciding.
Step 2: Collect the equipment and tools:
You'll need several pieces of equipment and tools to build your drone. Here's a list of frequently used equipment
- Screwdrivers (both Phillips and flathead)
- Pliers
- Wire cutters/strippers
- Soldering Iron and Sole
- Heat shrink tubing
- Multimeter
- Safety goggles
- Tweezers
- Anti Static mat (optional but highly advised)
Step 3: Look at the Instruction Manual before beginning the assembly process. Make sure you read the instruction manual that comes with your drone kit. Learn about the various elements, their roles, and how they connect. Understanding the instructions will aid you to avoid mistakes and solve problems.
Step 4: Begin by assembling your drone frame according to the instructions. It is usually about fixating on the landing gear, arms, and the body's central structure. Ensure you secure all screws correctly; however, be careful not to tighten them too tightly and cause damage to the components.
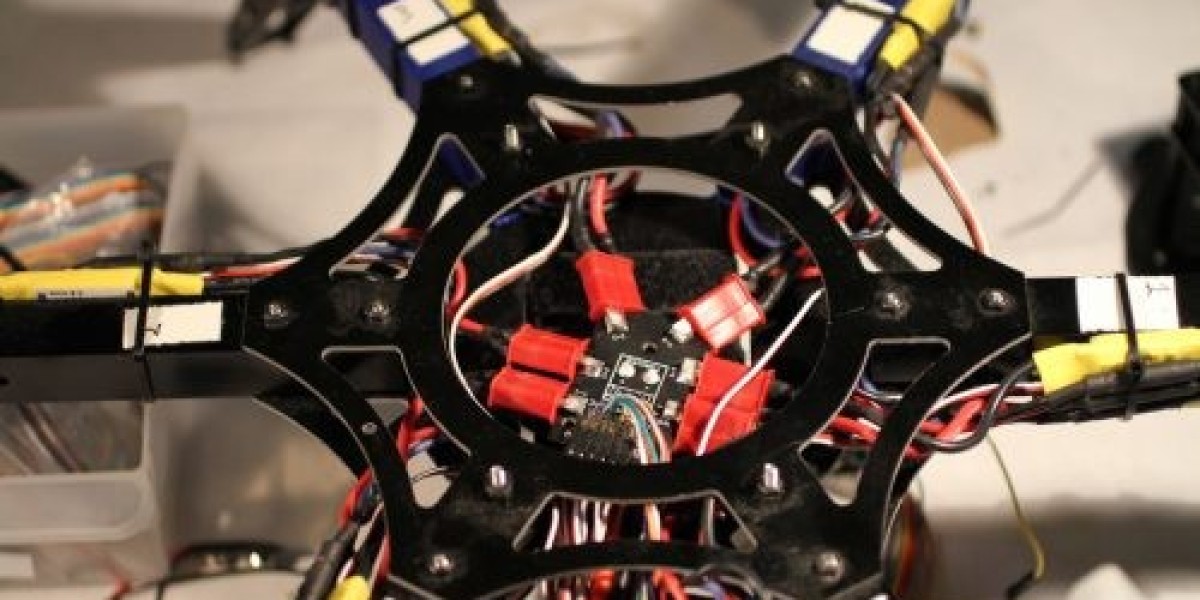
Step 5: Attach the Flight Controller. The flight controller acts as the drone's brain. It is the one responsible for stability as well as flight control. Follow the steps to put the flight controller onto the frame, ensuring it is aligned correctly and connected securely. Also, note any other components that need to be connected, such as GPS modules, power distribution boards, or other components.
6. Connect your electronic speed control (ESCs). The ESCs determine the speed of each motor. The ESCs with the motors on the outputs of the flight controller by ensuring that the wiring and the proper polarity are correct. Use soldering and heat shrink tubing to join the ESCs and ensure no short circuits.
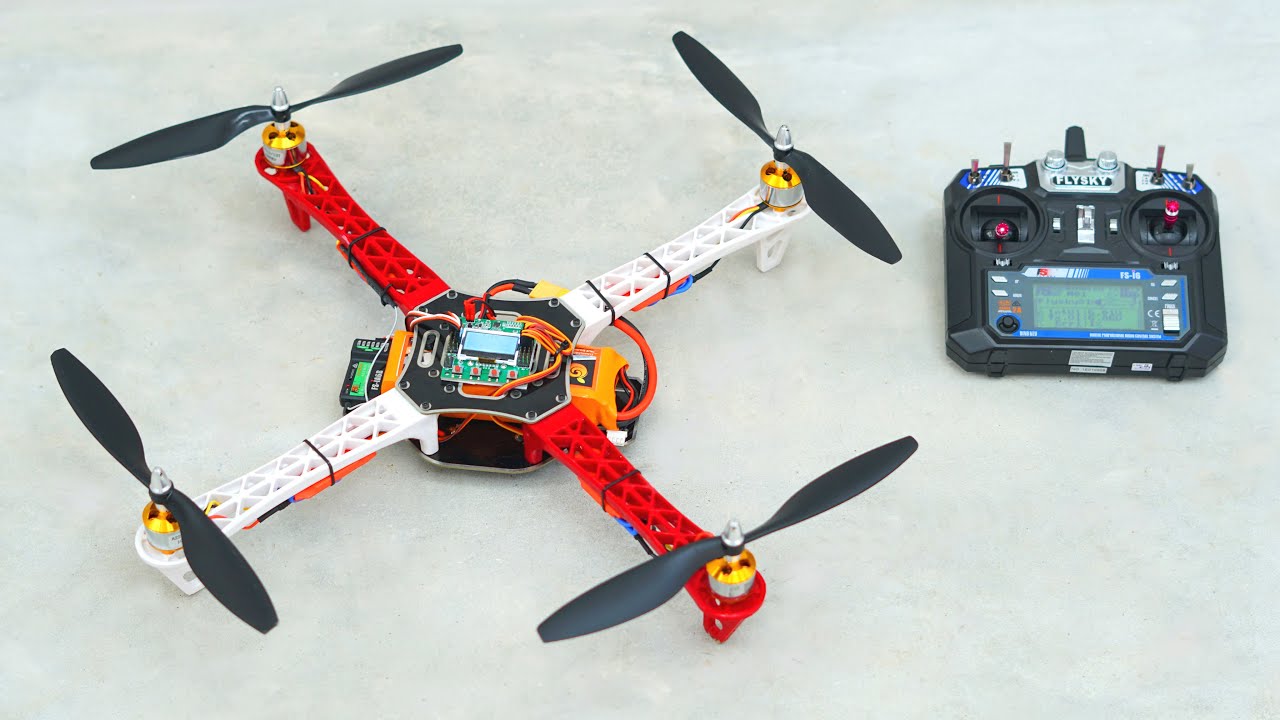
Step 7: Connect the Motors and Propellers Motors Connect the Propellers to the correct positions in the frame of your drone. Ensure that they are aligned correctly. Securely attach them by using the screws supplied. Then, put the propellers onto the motor shafts. Please make sure they are secure but not overly tightened. Keep an eye on the proper orientation of your propeller (clockwise and counterclockwise) to ensure stability in flight.
Step 8: Set up the radio transmitter and the Receiver radio receiver, and the transmitter lets the pilot the drone using a remote. Follow the instructions for connecting the receiver to your flight controller. The receiver should be connected to the transmitter according to the manufacturer's instructions. Ensure the controls are correctly calibrated, and the drone reacts to inputs.
Step 9: Then connect and check the Power System Connect the battery to the power distribution board or flight controller according to the configuration with your set. Check the polarity and make sure you are solid. Start the drone, and check the motor's responses to throttle commands using the transmitter. Check that the motors are spinning in the correct direction, and adjust the settings if needed.
Step10: Fine-tuning, Testing, and Testing After the initial setup, you can move to Step 10: Fine-tuning, Testing, and Retesting. After the initial setup, You can alter the characteristics of the drone's flight using the software offered by the firm. Modify parameters like Flight modes, PIDs, or stabilization levels to optimize efficiency. Conduct thorough inspections before the flight, including a propeller and motor inspections, to ensure all is in good working order.
In conclusion, constructing drones with drone kits is an exciting and rewarding project which lets you customize your drone to suit your specifications. By following this step-by-step guide and the steps provided, you'll be able to have your drone ready to begin its journey. Have fun, and enjoy the flight!
Be sure to follow all local laws and guidelines when operating your drone. Also, respect the security and privacy of other drone users.
If Anyone want suggestion for a good drone kit, then you may refer to this link: "DRONE KIT"